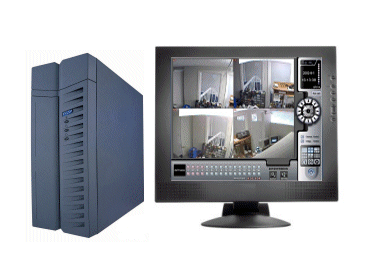
Remote Video Surveillance
There are three ways to perform remote video surveillance:
Option 1: DVR Client
The DVR Client is a Windows based program (installed on a remote computer) that is designed for administrators to do everything they need to do to manage the DVR system including checking the system status, searching the stored data, and even changing the user settings and the recording schedule. This is a huge step forward from the days when an administrator had to physically sit in front of the specific computer that the DVR was installed on to perform these functions.
Option 2: Smart Phone
The DVR Client is a Windows based program (installed on a remote computer) that is designed for administrators to do everything they need to do to manage the DVR system including checking the system status, searching the stored data, and even changing the user settings and the recording schedule. This is a huge step forward from the days when an administrator had to physically sit in front of the specific computer that the DVR was installed on to perform these functions.
Option 3: Web Browser
 The second way to view the cameras remotely is through an internet browser such as Microsoft's Internet Explorer. This approach is designed for other users of the system - who just want to see what is going on in real-time at the site but don't need to perform administrative functions on the system. To access this view simply type in the ip address into your internet browser, for example http://50.79.86.82/. This browser approach does not require any specific software on the client's machine however since it uses an ActiveX control that is not yet a certified application program (see info on certification at http://www.thawte.com) you must have your Security Settings set to enable this type of ActiveX control. Click here for details on how to set your security settings correctly.
Both of these options allow you to connect to your cameras via internet or modem. However, if you want to connect remotely via modem you must set up your DVR system specifically for modem and similarily for access via internet. It is strongly recommended that you connect via internet - specifically using a high speed connection such as DSL or cable modem.
When you set up your DVR system for remote connection over the internet - you must be sure to get a static IP address and it must not be behind a firewall. In some cases more than one computer are attached to one Internet connection. In this case you would need to contact whoever supports your router or cable modem, and let them know that you need to have one of the computers directly on the Internet. Typically this is done by a setting in the router.
There are several items to consider in your setup of the cameras to make the best use of the disk and data transmission resources (called bandwidth). In general, the better the quality of the captured image, the larger the file size will be - so it will take up more disk space to store and take longer to transmit remotely. You need to find the best balance between quality of the image and size of the image file that works for you.
- Disable any cameras that you are not using. For example, if you have a 16 camera system but you only have 10 cameras connected to it, make sure the 6 camera inputs that are unused are disabled.
- For each camera, set the Camera Resolution. Currently your choices are 320 by 240 or 640 by 480. We recommend setting it at 320*240, since setting it at 640*480 will more than double the space requirements for recording video.
- For each camera, choose the Compression recording format (jpeg or mpeg), and change the compression rate. (Positioning the knob left will reduce both the image size and picture quality). When recorded in mpeg format the files cannot be played in reverse while searching. However, we highly recommend using the mpeg format to save space.
- For each camera, choose the transmission format (jpeg or mpeg) and compression rate for the images transmitted on the network. Mpeg files are smaller and faster on a network. Jpeg files are larger but are better quality.
When it comes to conserving resources, motion-detection should also be mentioned. Each camera can be set up to only store images when motion is detected in the image. This keeps you from storing hours of video of the same thing, for example, when a store is closed at night. Keep in mind that you can still view the cameras in real-time - its just that the images are not being stored on the hard drive (and cannot be played back). Motion detection is a great feature and can save tons of disk space. This doesn't affect the performance of remote viewing except when you are remotely searching through historical video - it can save lots of bandwidth (and time!) because you only transmit the parts of video that contain movement.
Last Modified: Jun 1, 2009